Pinch of Mint · www.pinchofmint.com/recipes/crispy-pork-belly
Crispy pork belly

By Tom · Updated
- About 5 hours 35 min
- Takes a bit of care
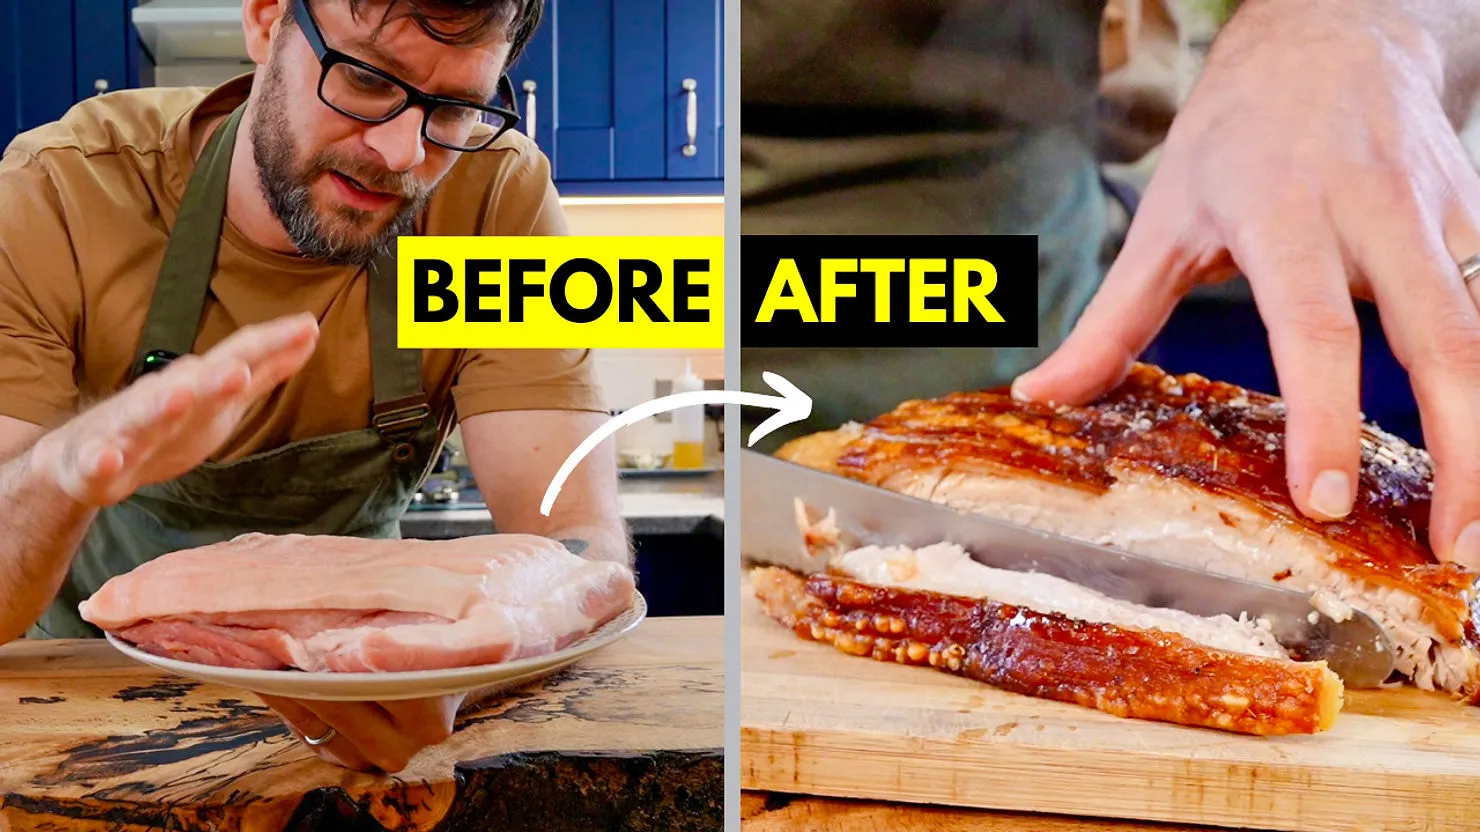
This is my go-to pork belly recipe for getting that satisfying crunch every single time. Whether you're a beginner or a home cook looking to level up, this one's for you. How to get crispy pork belly skin with tender, juicy meat.
Loads from YouTube only once you press play.
The recipe
Crispy pork belly
This is my go-to pork belly recipe for getting that satisfying crunch every single time.
- 15 min prep
- 5 hours cooking
- 20 min hands-off
- Takes a bit of care
Times and difficulty are our estimates from the method, not stopwatch figures.
Ingredients
For the pork belly
For the baked apple sauce
Tick things off as you go — they stay ticked if you close the page.
A dotted underline means the amount has been rounded to something you can measure.
Method
Step 1: prep the pork
- Step 1
Remove the pork belly from any packaging and pat it completely dry with paper towels.
- Step 2
Place it uncovered in the fridge for at least a few hours - overnight is best. This helps dry the skin for maximum crispiness.
Step 2: score & season
- Step 1
Using a very sharp knife or a clean Stanley blade, score the skin in straight lines about 1 cm apart. Cut through the skin and fat, but try to avoid piercing the meat.
- Step 2
Generously season the entire joint (1 joint) - both skin and underside - with sea salt and black pepper. Feel free to add dried herbs or spices to the meat side if you like.
Step 3: build your flavour base
- Step 1
In a roasting tray, add the chopped onions (3), carrot (1), and halved garlic (1 garlic) bulb. This acts as a flavourful trivet that lifts the pork and adds depth to the juices.
- Step 2
Place the pork belly on top, skin-side up.
Step 4: roast for crispy skin + tender meat
- Step 1
Preheat your oven to 220°C (430°F).
- Step 2
Roast the pork at 220°C for 45 minutes to start blistering the skin.
- Step 3
Then, reduce the heat to 160°C (320°F) and cook for another 4 hours. This slow roast ensures beautifully tender meat beneath that golden crackling.
Baked apple sauce
- Step 1
With 40 minutes left on the pork cooking time, add the apple (3 apples) quarters to the tray beside the pork (or in a separate tray if there's no space).
- Step 2
Once soft, remove and blend the apples (3 apples) until smooth. Stir in the butter (10 g) and a pinch of salt. Add sugar if desired, depending on how sweet you like it.
Rest & serve
- Step 1
Once the pork is done, let it rest for at least 15-20 minutes to allow the juices to settle.
- Step 2
Slice through that crispy skin, serve with the apple (3 apples) sauce, and enjoy the perfect balance of crackly top, juicy layers, and sweet-sharp appleon the side.
Pro tips
- Step 1
If the skin isn't crackling at the end, pop it under a hot grill for a few minutes - but watch it closely.
- Step 2
• • Save the juices from the pan - they make an incredible sauce or gravy base.
Stay in the loop
Get new recipes in your inbox
Occasional emails with new recipes, cooking tips and what’s new at Pinch of Mint.
See our Privacy Policy for information about how your personal data is used.
More pork dinners


Questions people ask
How long does crispy pork belly take?
About 5 hours 35 min from start to finish: 15 min of prep, 5 hours of cooking, and 20 min hands-off while it waits. That figure is worked out from the method rather than timed with a stopwatch, so give yourself a little more the first time.
How much does this make?
The original recipe did not state a yield, so nothing has been invented for it. The scale control on the recipe card multiplies the quantities instead, which is the honest version of the same thing.
Can I see the ingredients in ounces and pints?
Yes. The metric and imperial switch on the recipe card converts every quantity, rounded to amounts you can actually weigh or measure rather than to four decimal places. Your choice is remembered for every recipe on the site.
Crispy pork belly · Pinch of Mint · www.pinchofmint.com/recipes/crispy-pork-belly